About Google Tag Manager
From the Google Tag documentation website we find out:
The Google tag powers the Google products you use with the data to measure the effectiveness of your website and ads. The Google tag sends data to connected destinations, such as Google Ads and Google Analytics 4.
As website technologies such as cookies continue to evolve due to privacy, browser, and regulatory changes, having high-quality, site-wide tagging is important to help ensure you’re getting the most accurate measurement.
Tags are a convenient way of grouping tracking resources for more granular overview of the effectiveness of your marketing efforts. In this article we will look at setting up a fictional conversion event of the Thank you page of an ecommerce flow. We will use the popular Next.js in Typescript and we will follow the setup from GTM (Google Tag Manager) and Analytics v4 down to triggering the Next page event.
The payment flow
In a payment flow that does not require PCI-DSS compliance a store owner integrates either the embedded front-end payment form (that walks the user through the payment steps without leaving the merchant page) or the async flow where the customer is redirected to the payment gateway page and at the end lands back at the merchant payment confirmation page (the so-called Thank you page).
It is on this last page that we want to register the conversion (although, technically, in an async flow the payment might still fail at this stage - but the contract is agreed upon from a marketing perspective and we can come back to the user with a payment request).
Setting up Google Analytics
The ecommerce flow should trigger in Google Analytics a custom purchase event that we need to setup. You can imagine that in a real world shop we would have multiple such events, from the customers browsing through shop categories to them adding or removing items from the shopping cart. The purchase event is the conversion part of the journey, the one that tells us wheather the user has followed our marketing story to completion or we need to improve it.
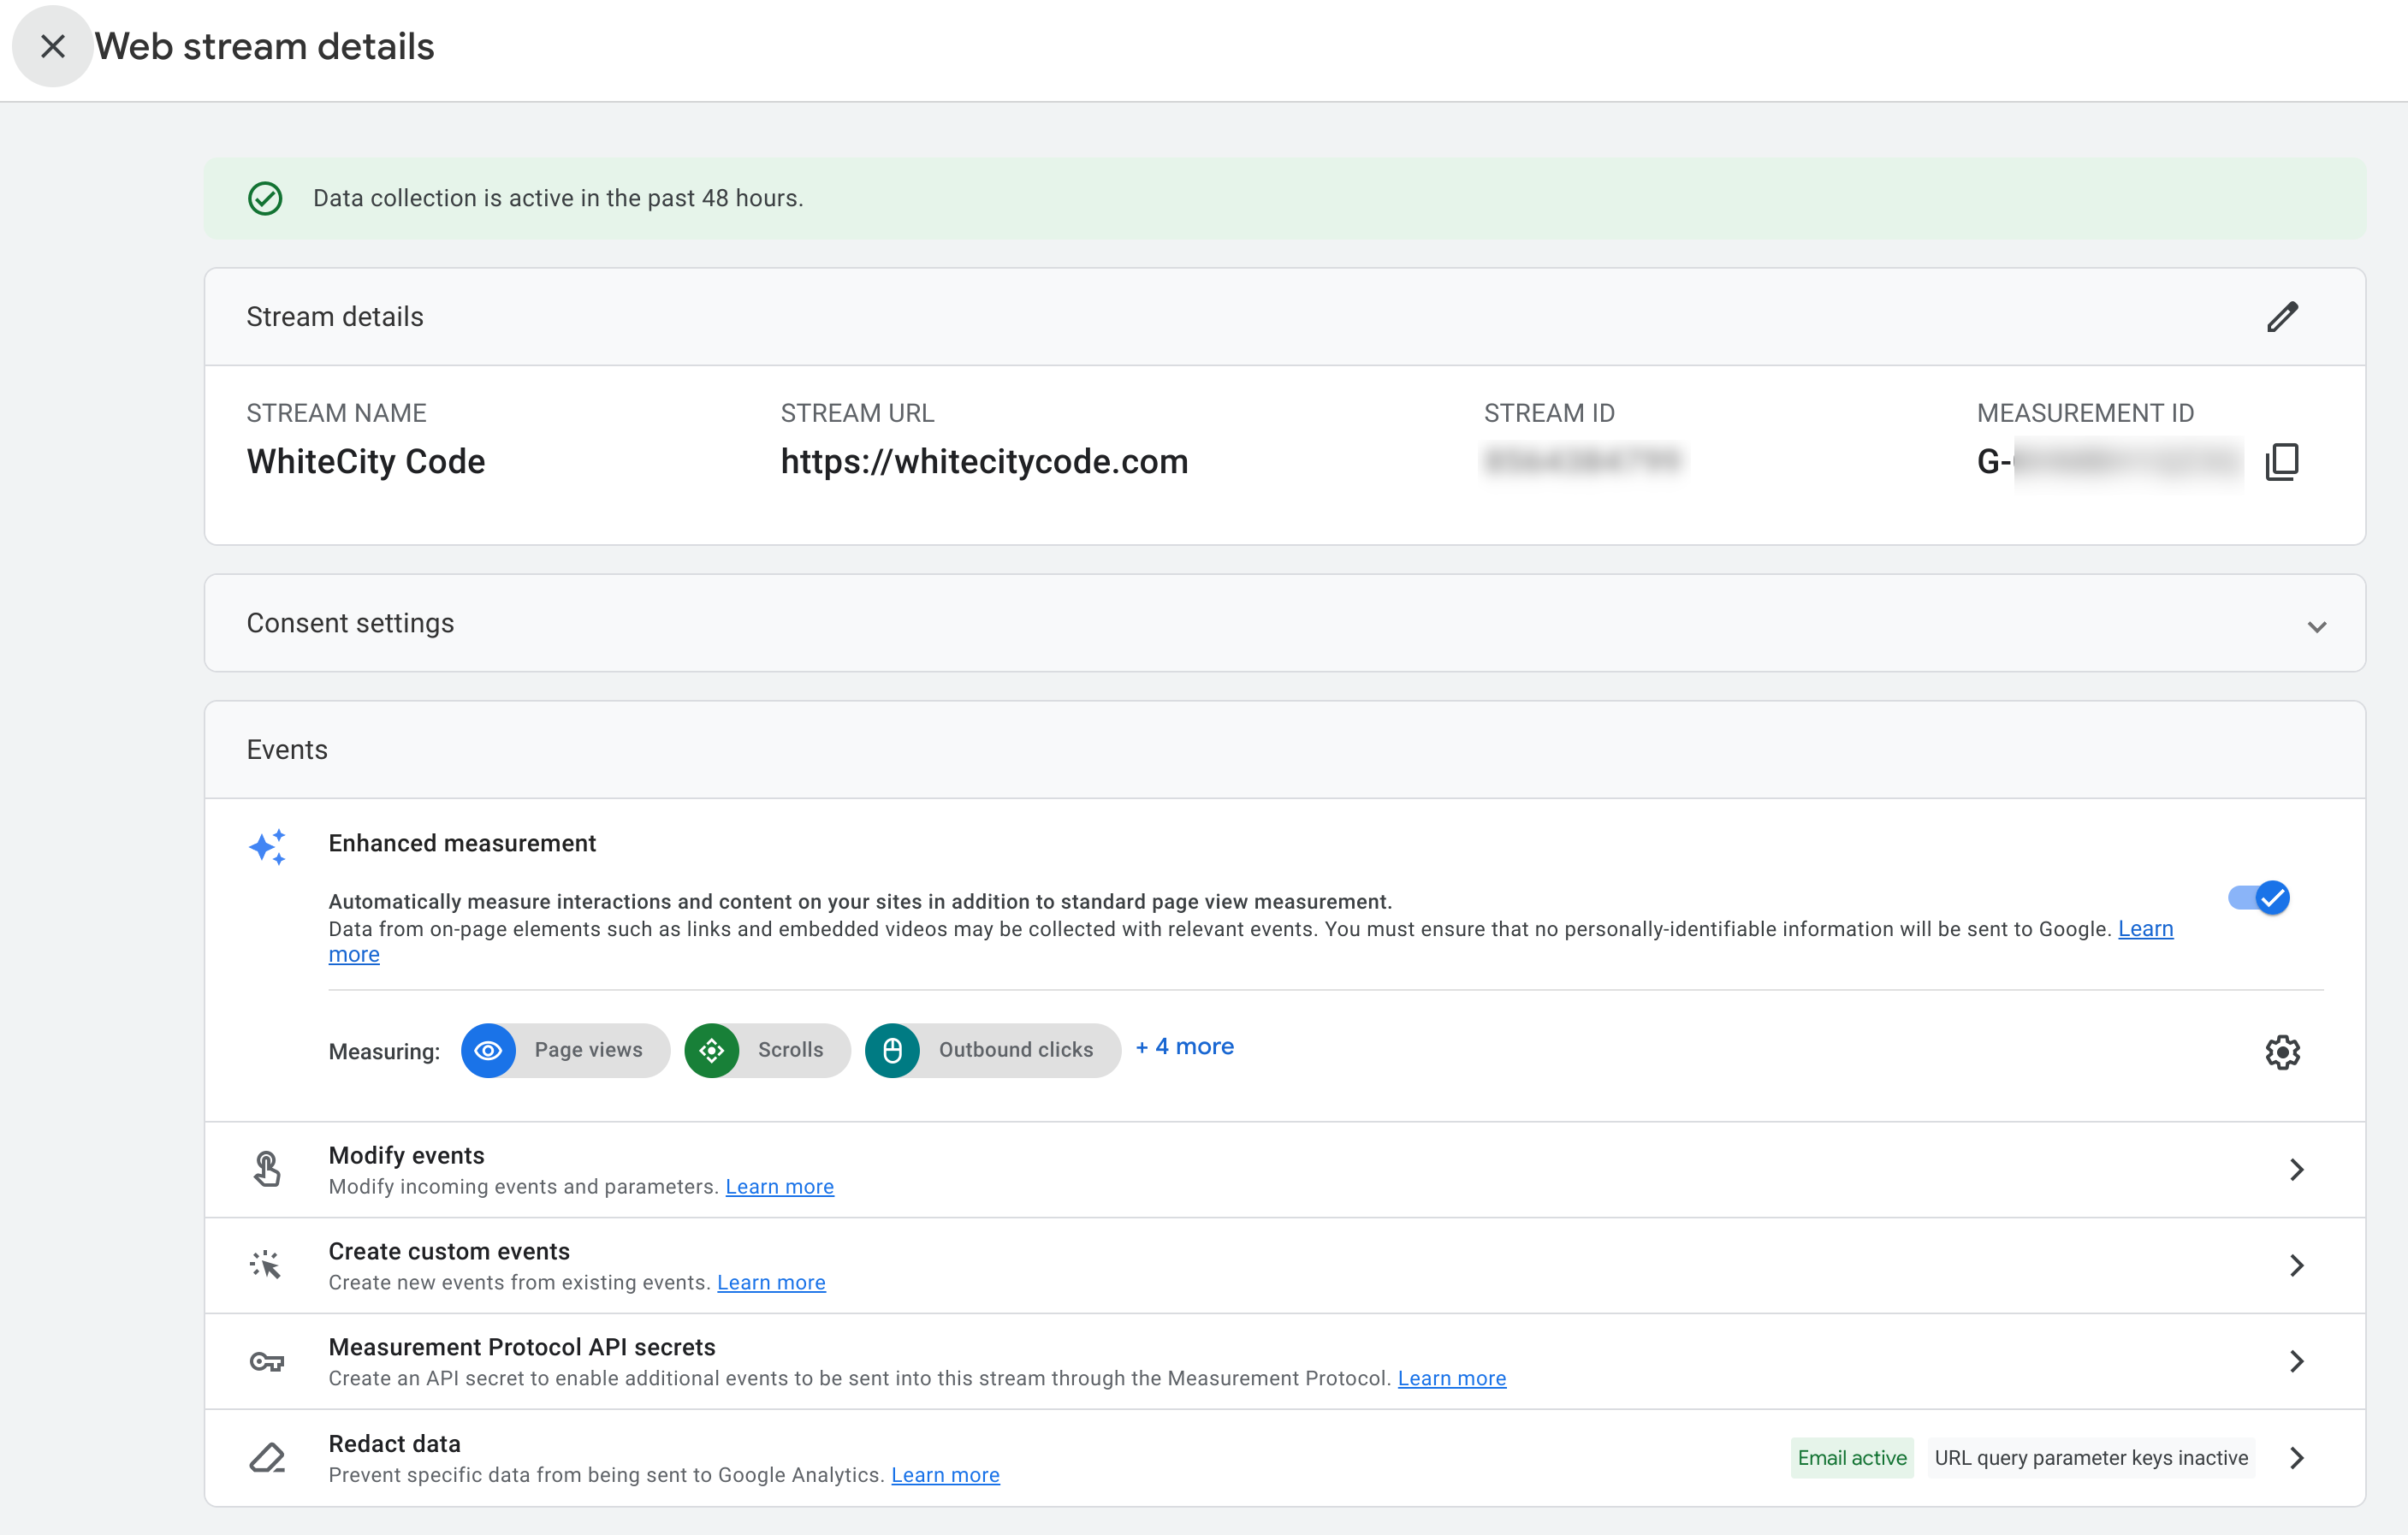
In Goole Analytics we need to setup a property and then for our shop we need to setup a web data stream. The result of setting up the stream is a Measurement ID (we need to remember this one as this is the piece of information used to link GTM afterwards).
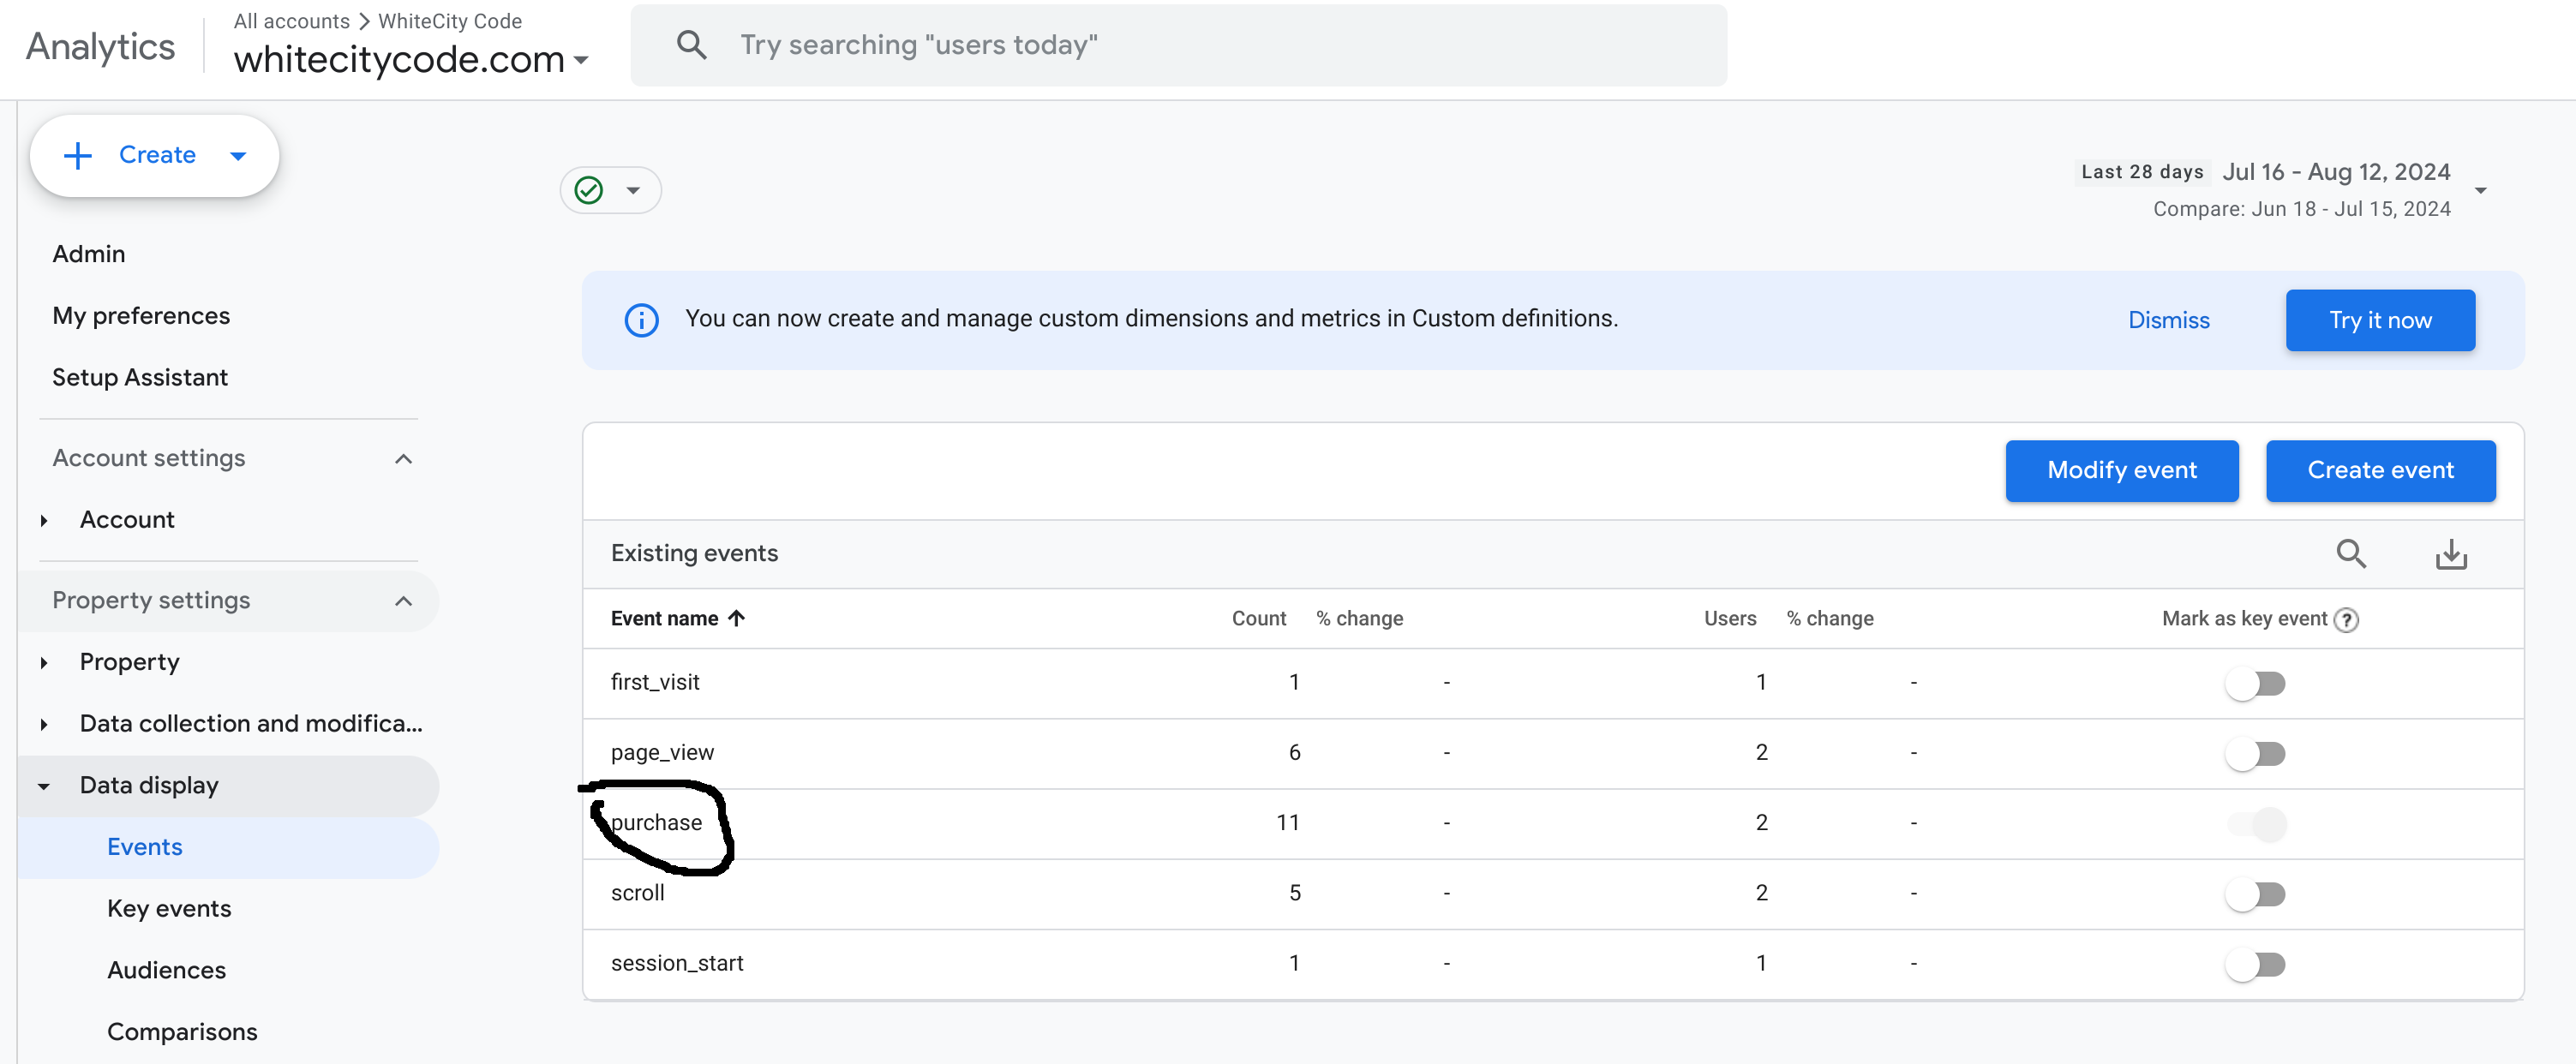
In this stream we set up a custom event, with just the event name being important: purchase.
Setting up Google Tag Manager
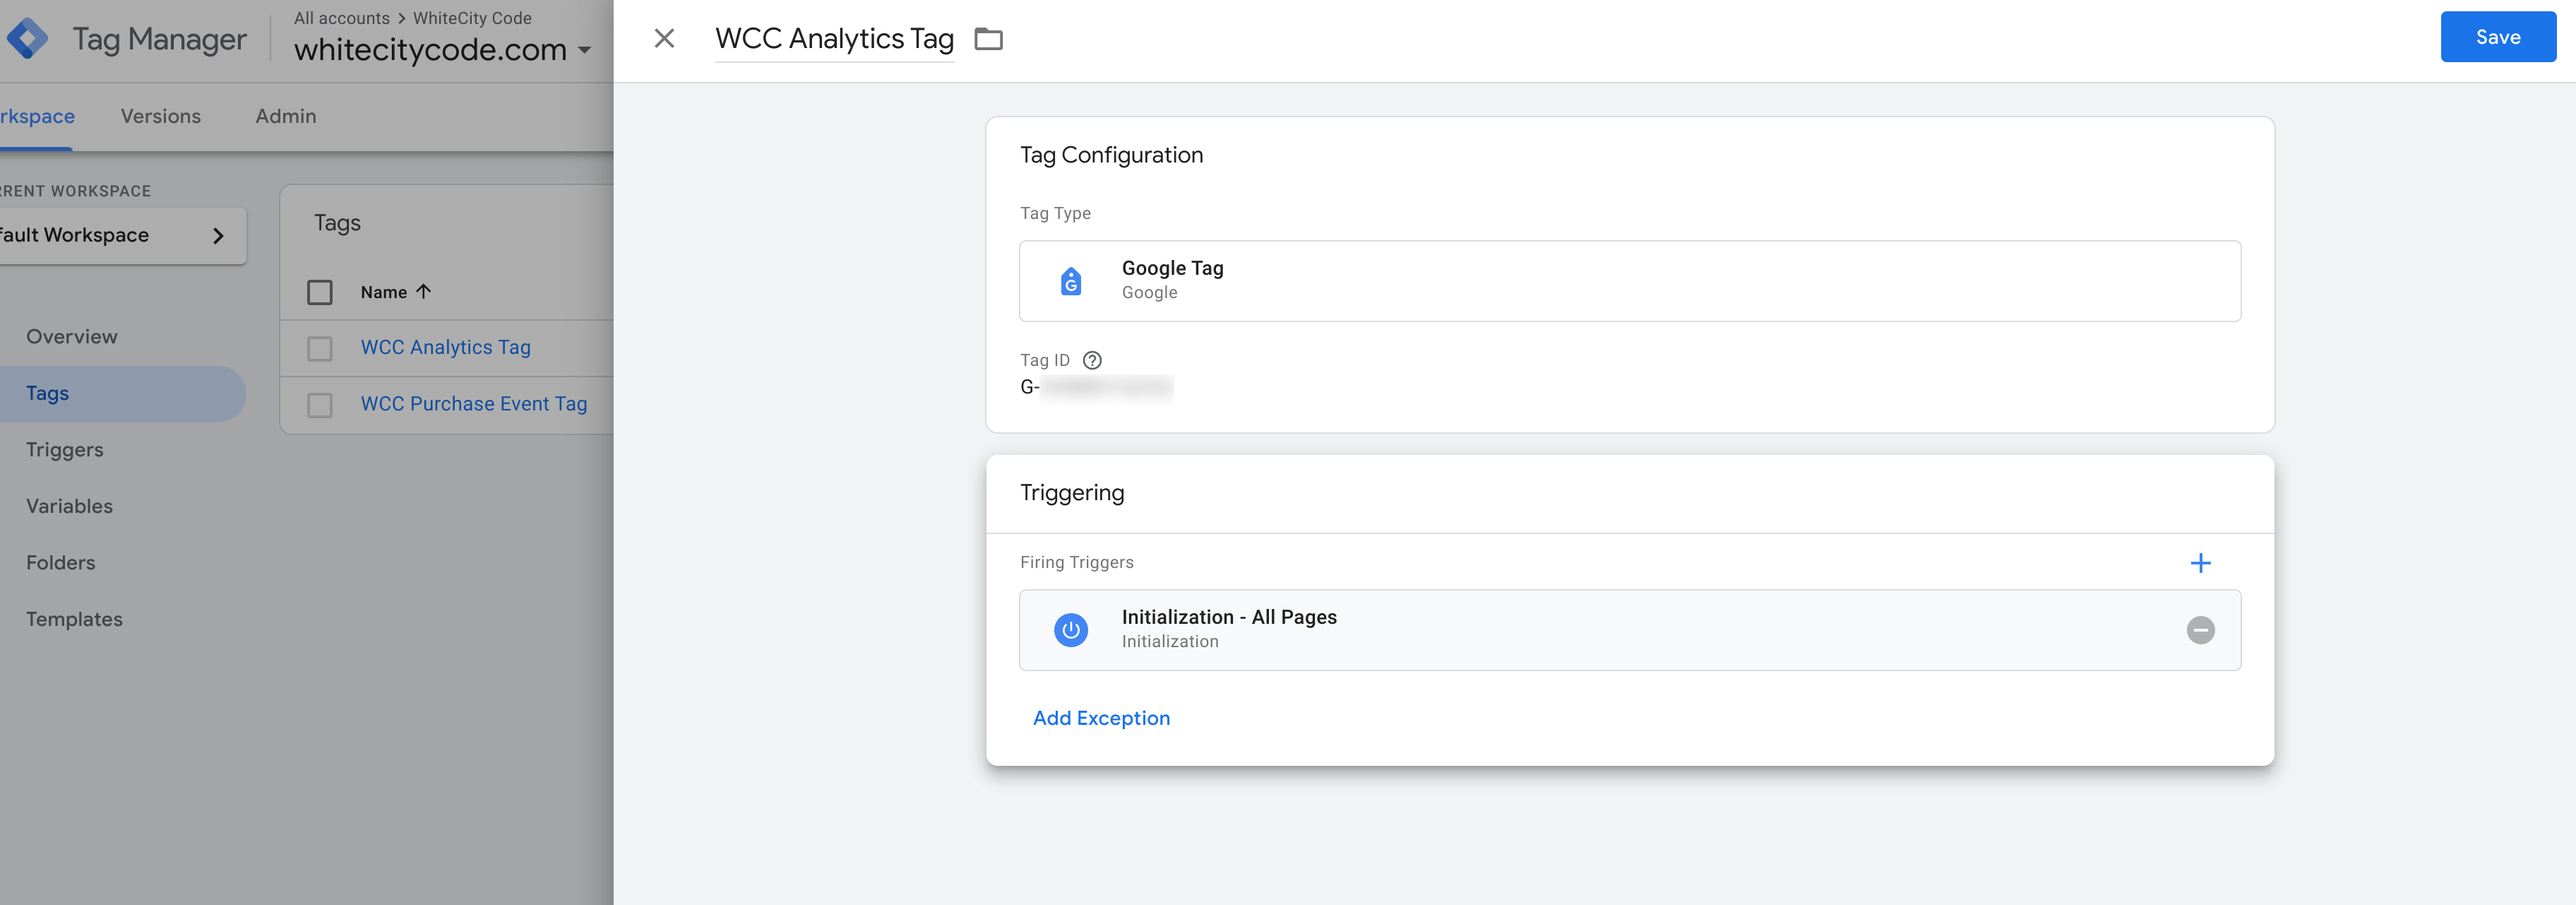
Setting up GTM involves as a first step connecting the two accounts via the Measurement ID by the means of an initialization tag. This tag is triggerd on all pages where the Google Tag Manager script is included and it configures the link between GTM and your website. Notice that the Tag ID in the configuration should be the same as the Measurement ID in GA Web Stream.
Next we need to setup the tag and the trigger in GTM for the GA event. We do this by configuring a GA V4 Event tag in GTM:
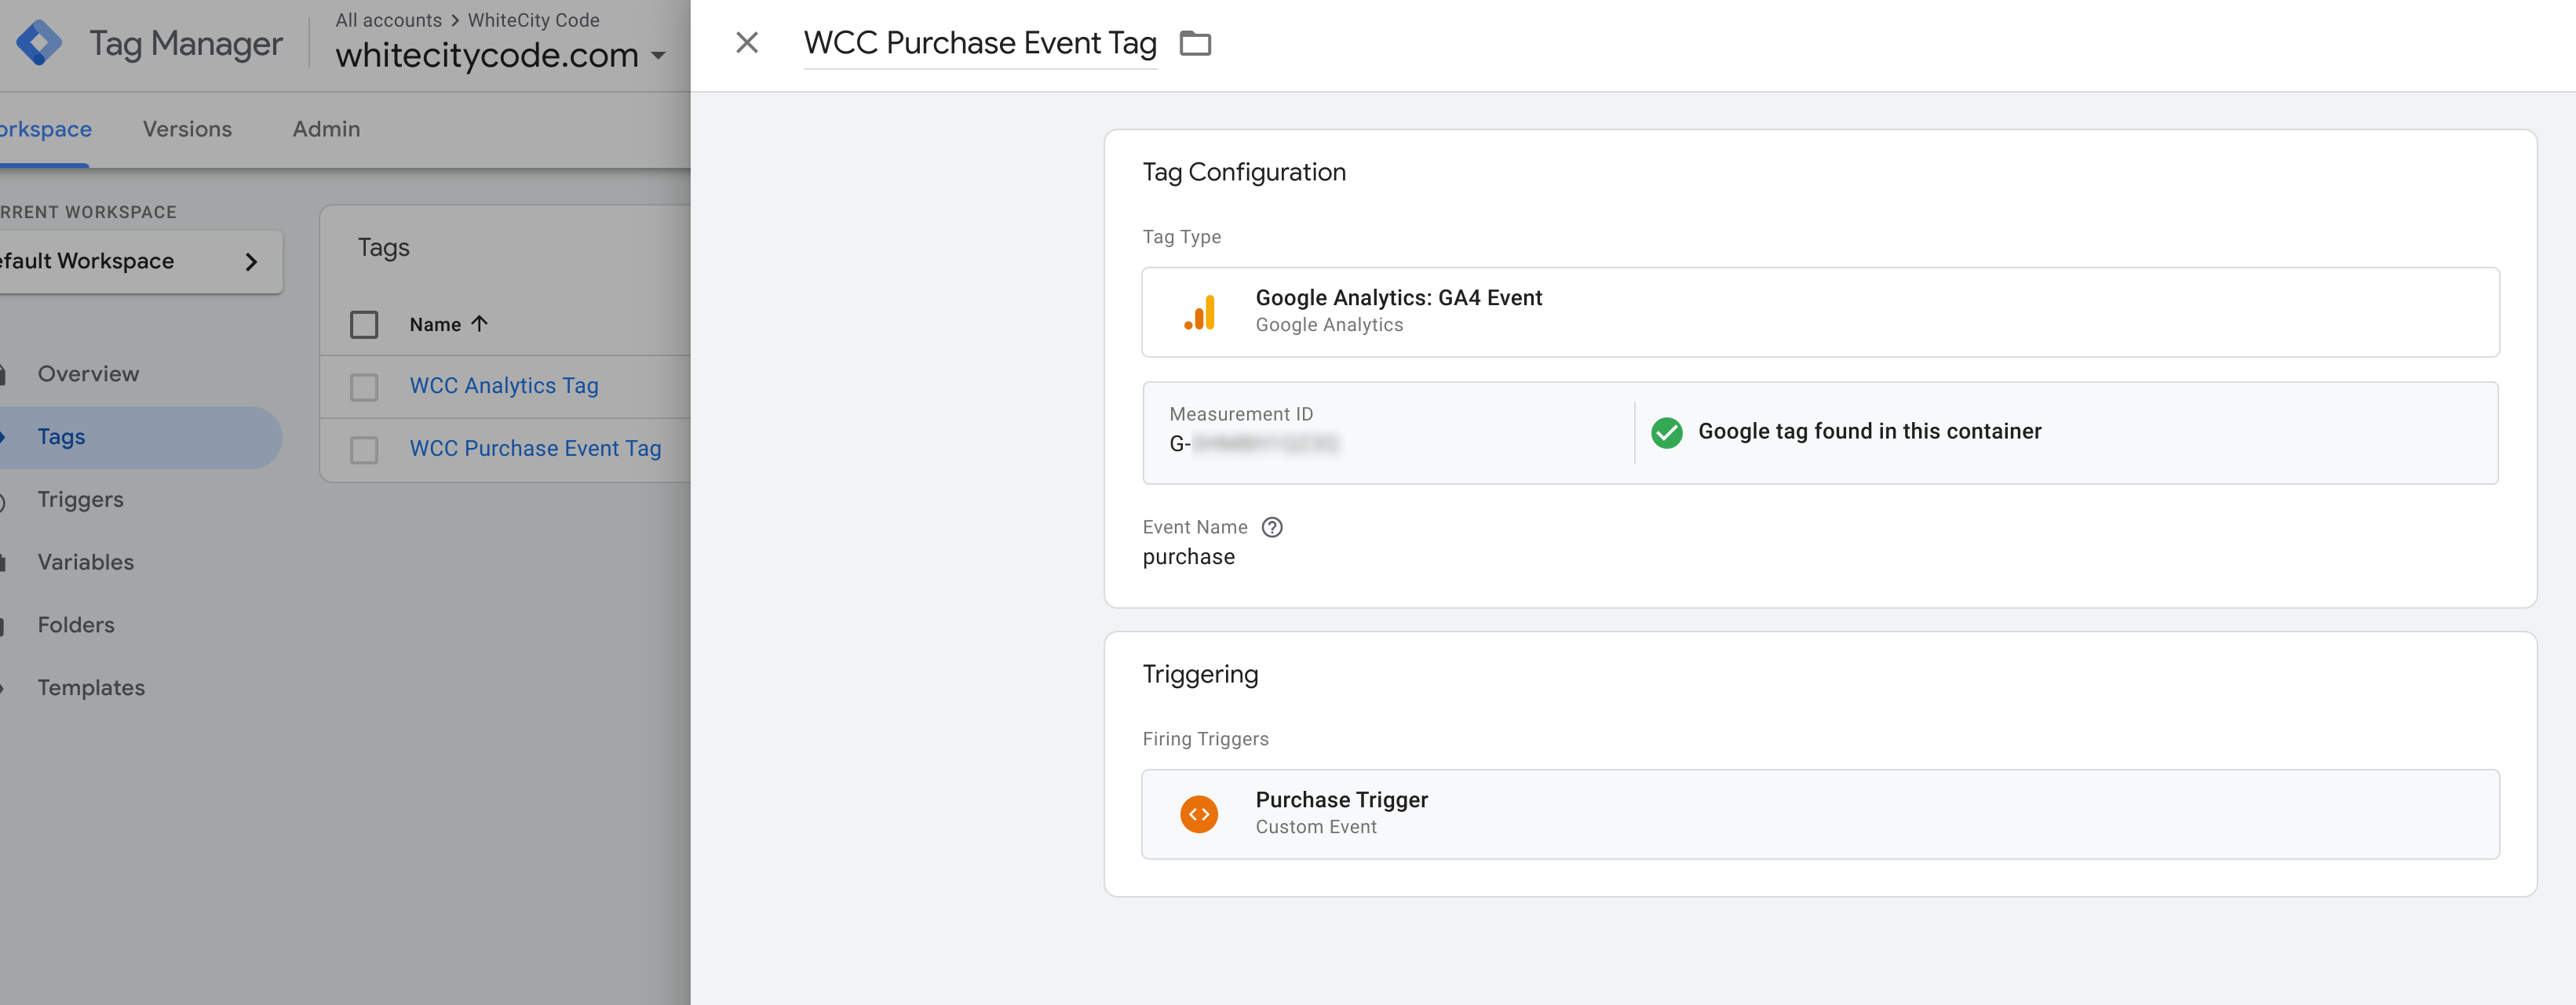
Notice the custom Purchase Trigger which is a trigger based just on the name of the event: purchase.
Integrating in Next.js
We will need for this the @next/third-parties package, which includes Google Analytics and Google Tag Manager components for React and calls for the publishing of data in these platforms, as specified in the Next docs.
We will include the initialization part of the GTM and GA libraries in the layout of our Next.js installation so that the setup occurs on all pages and routes we might wanna track.
In Typescript we would place these two tags one - before the head tag and the other - after the body tag (order did seem to matter, this definietly looks like a bug).
import { GoogleTagManager } from '@next/third-parties/google'

export default function RootLayout({
  children,
}: {
  children: React.ReactNode
}) {
  return (
    <html lang="en">
      <GoogleTagManager gtmId="GTM-XYZ" />
      <body>{children}</body>
      <GoogleAnalytics gaId="G-SOME" />
    </html>
  )
}
We then need the Thank you page that includes the code actually firing the event on component load:
import PurchaseTracker from '../../components/PurchaseTracker';

export default function PurchasePage() {
    return (
        <PurchaseTracker session={{id: "cevaid"}}></PurchaseTracker>
    )
}
To this page we pass the payment session in case we want to extract from the session information about the purchase that we want to track in Analytics.
Note that the component is a client component so that we can make use of the Next-provided integrations (front-end only). This means that the information is populated at load time directly from the server-side rendering process. We usually obtain this information on the server-side via a payment session ID that we pass on when redirecting to the Thank you page. We use this ID on the server side (where we can securely store the payment gateway API keys) to retrieve the checkout session information, filter out the sensitive pieces and render the result directly into our front-end tracking component.
The actual tracking component just calls the GTM event code to mark the purchase. For demonstration purposes we here call it on a button click, in a real-world scenario we would call the action on component load, while being careful not to duplicate calls on component lifecycle.
'use client'
import { sendGTMEvent } from '@next/third-parties/google';

type Props = {
    session: Record<string, unknown>
}
export default function PurchaseTracker({ session }: Props) {
    return (
        <button onClick={() => {
            sendGTMEvent({event: "purchase", value: {some: 20}});
        }}>Track</button>
    )
}
We would also use the session prop (that should have a proper type according to the DTO that was rendered on the server-side) to pass on information to the event (like transaction ID, values, line items, totals, taxes and so on).
Checking your work locally
Google has gone to great lengths to allow you to preview the tracking results. In the preview setup you can enter a testing URL to which the tag gets connected (include any route path too) and Google will open a window with that URL and a debug marker and will allow you to see any events fired on that page.
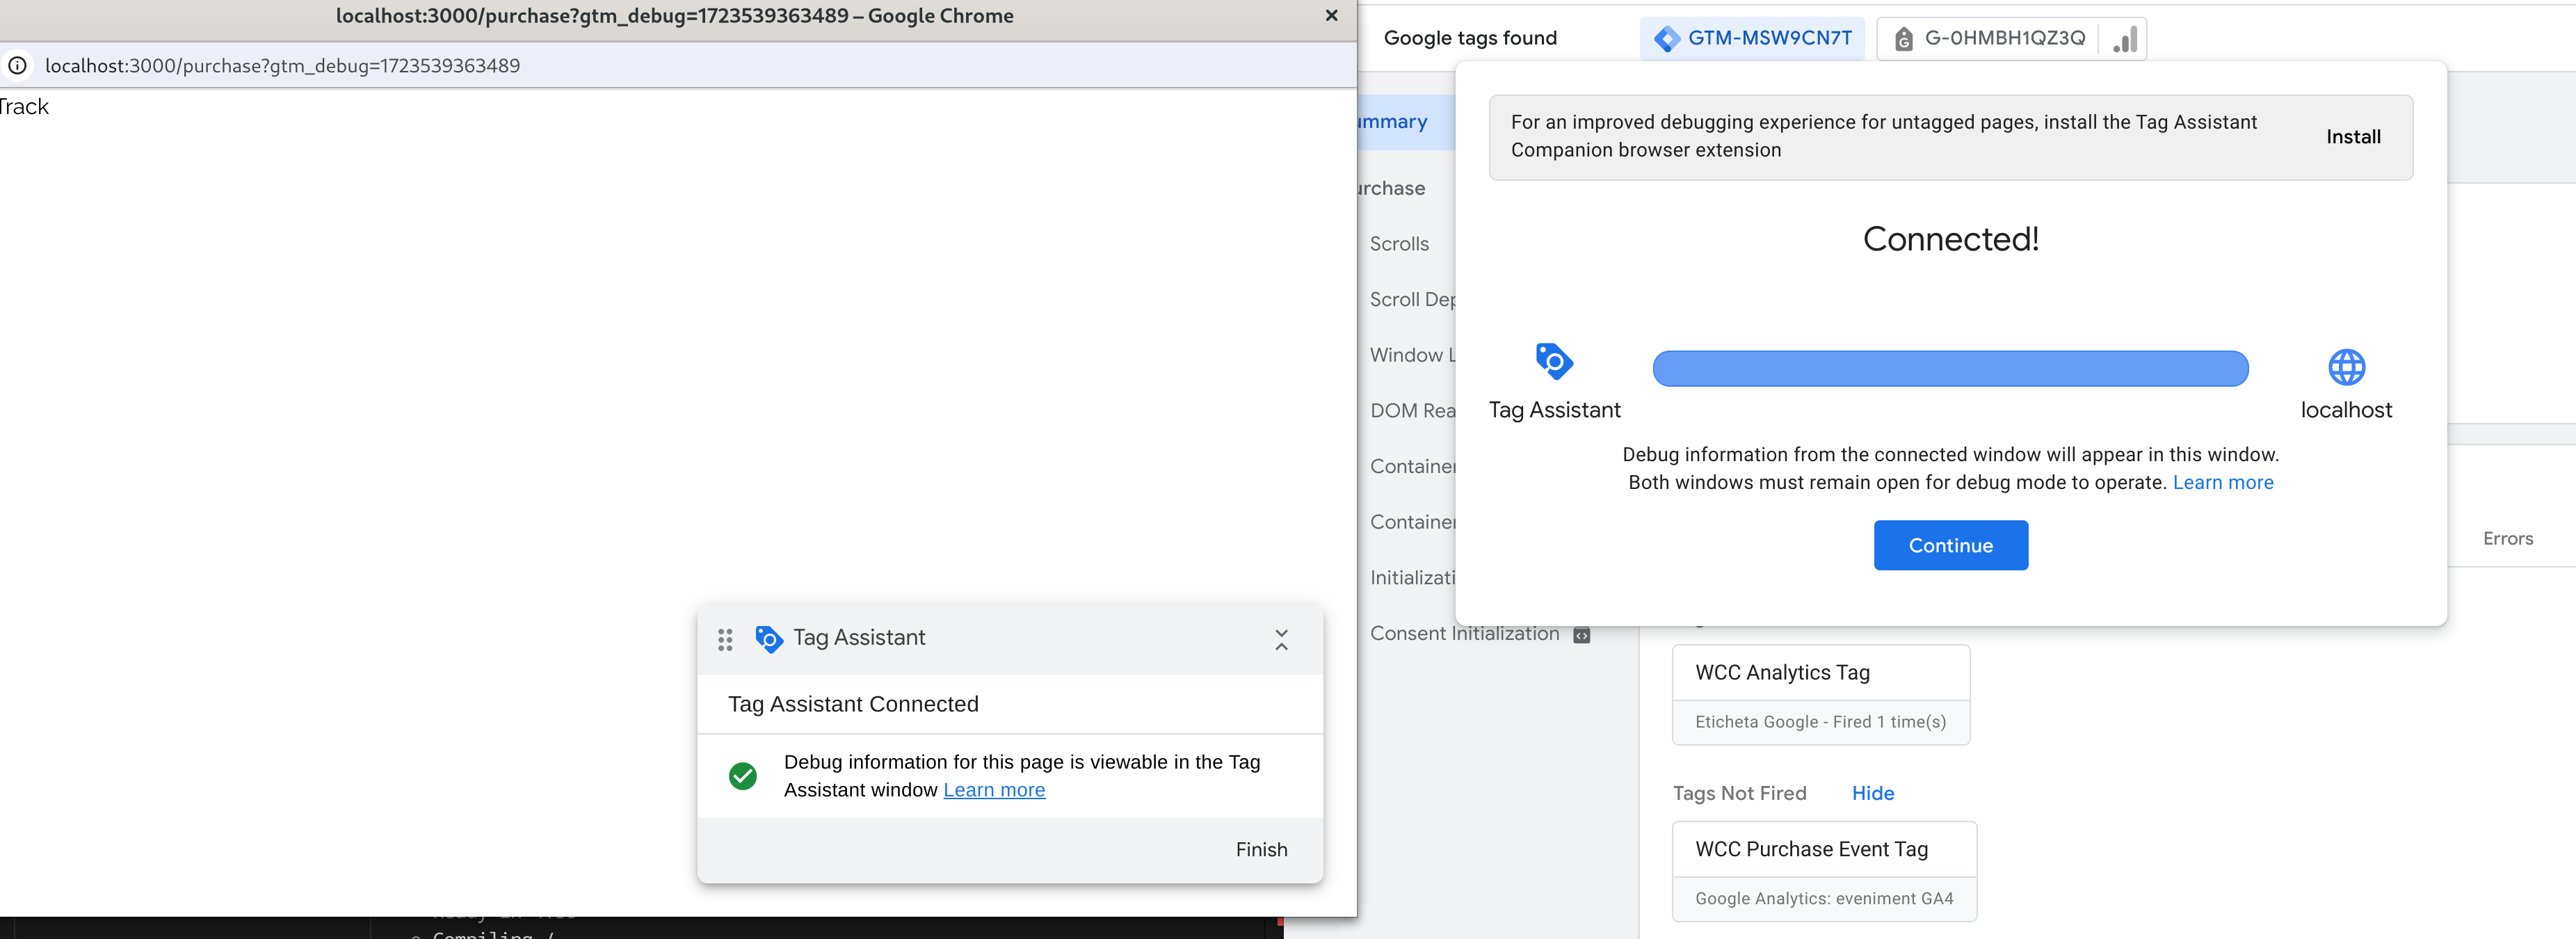
We trigger the preview from the top-right GTM Workspace window and we will get prompted to setup a test host. We use our local Next installation to test and sure enough after connection we can click our Track button with our purchase event immediately visible on the event list.
With a real setup we can even check our analytics on GA being fired in realtime section of the property. An important aspect here is to watch out for the URL of the website being the correct one for the Web Stream, otherwise the tracking will be ignored.
Implement this yourself!
This concludes our GTM and GA setup for custom events with Next.js and Typescript. We hope that this is useful for anyone attempting to piece the entirety of the puzzle together when setting up custom tracking events for analytics. Thank you for the long read!
